


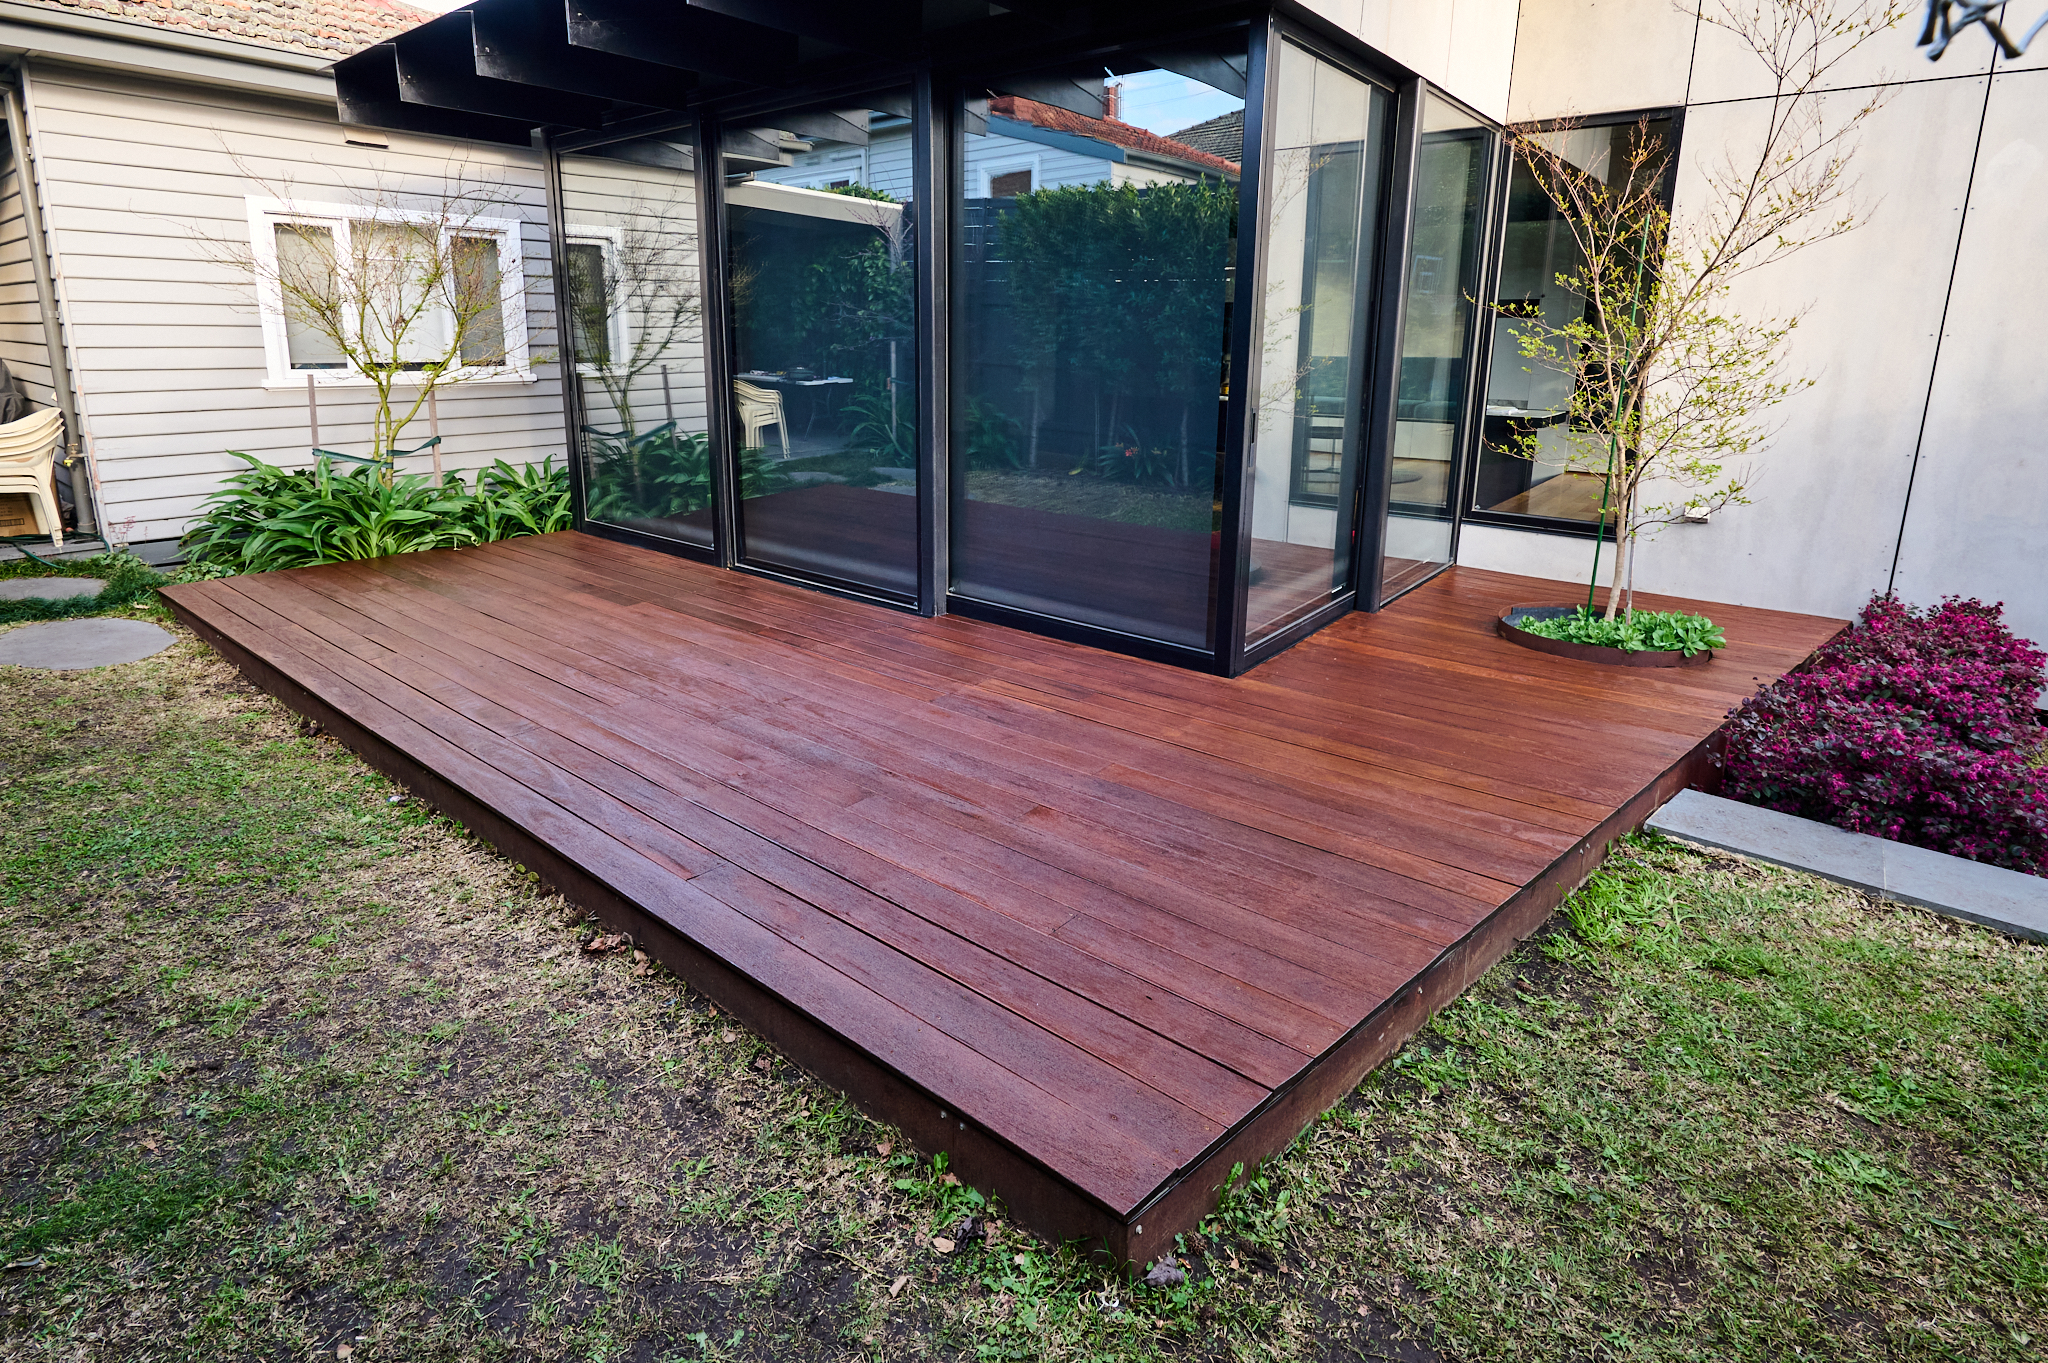
A beautifully stained timber deck can completely transform your outdoor space, making it more inviting, stylish, and ready for entertaining. Beyond its visual appeal, deck staining plays a vital role in protecting your timber from the harsh elements. Sun exposure, rain, and daily use can cause timber to fade, dry out, and lose its natural character over time. Regular deck maintenance helps prevent these common issues and keeps your outdoor space looking its best. Staining not only restores the colour and warmth of the wood but also helps creates a protective barrier that repels water and resists UV damage.
That’s where Monarch’s Decking & Stain Applicator Kit comes in! Designed for both DIYers and professionals, this complete kit includes everything you need to prepare and stain your deck efficiently, helping you achieve a smooth, even finish without the hassle. Whether you’re refreshing a weathered surface or staining bare timber for the first time, follow this step-by-step guide to create a deck that looks professionally finished and stays that way.
What You’ll Need
Before getting started, gather your tools and materials to ensure a seamless process. Having everything ready will help you work efficiently and achieve a consistent result.
- Monarch Decking & Stain Applicator Kit
- Sander (sandpaper or electric sander)
- Decking stain (in your preferred colour and finish)
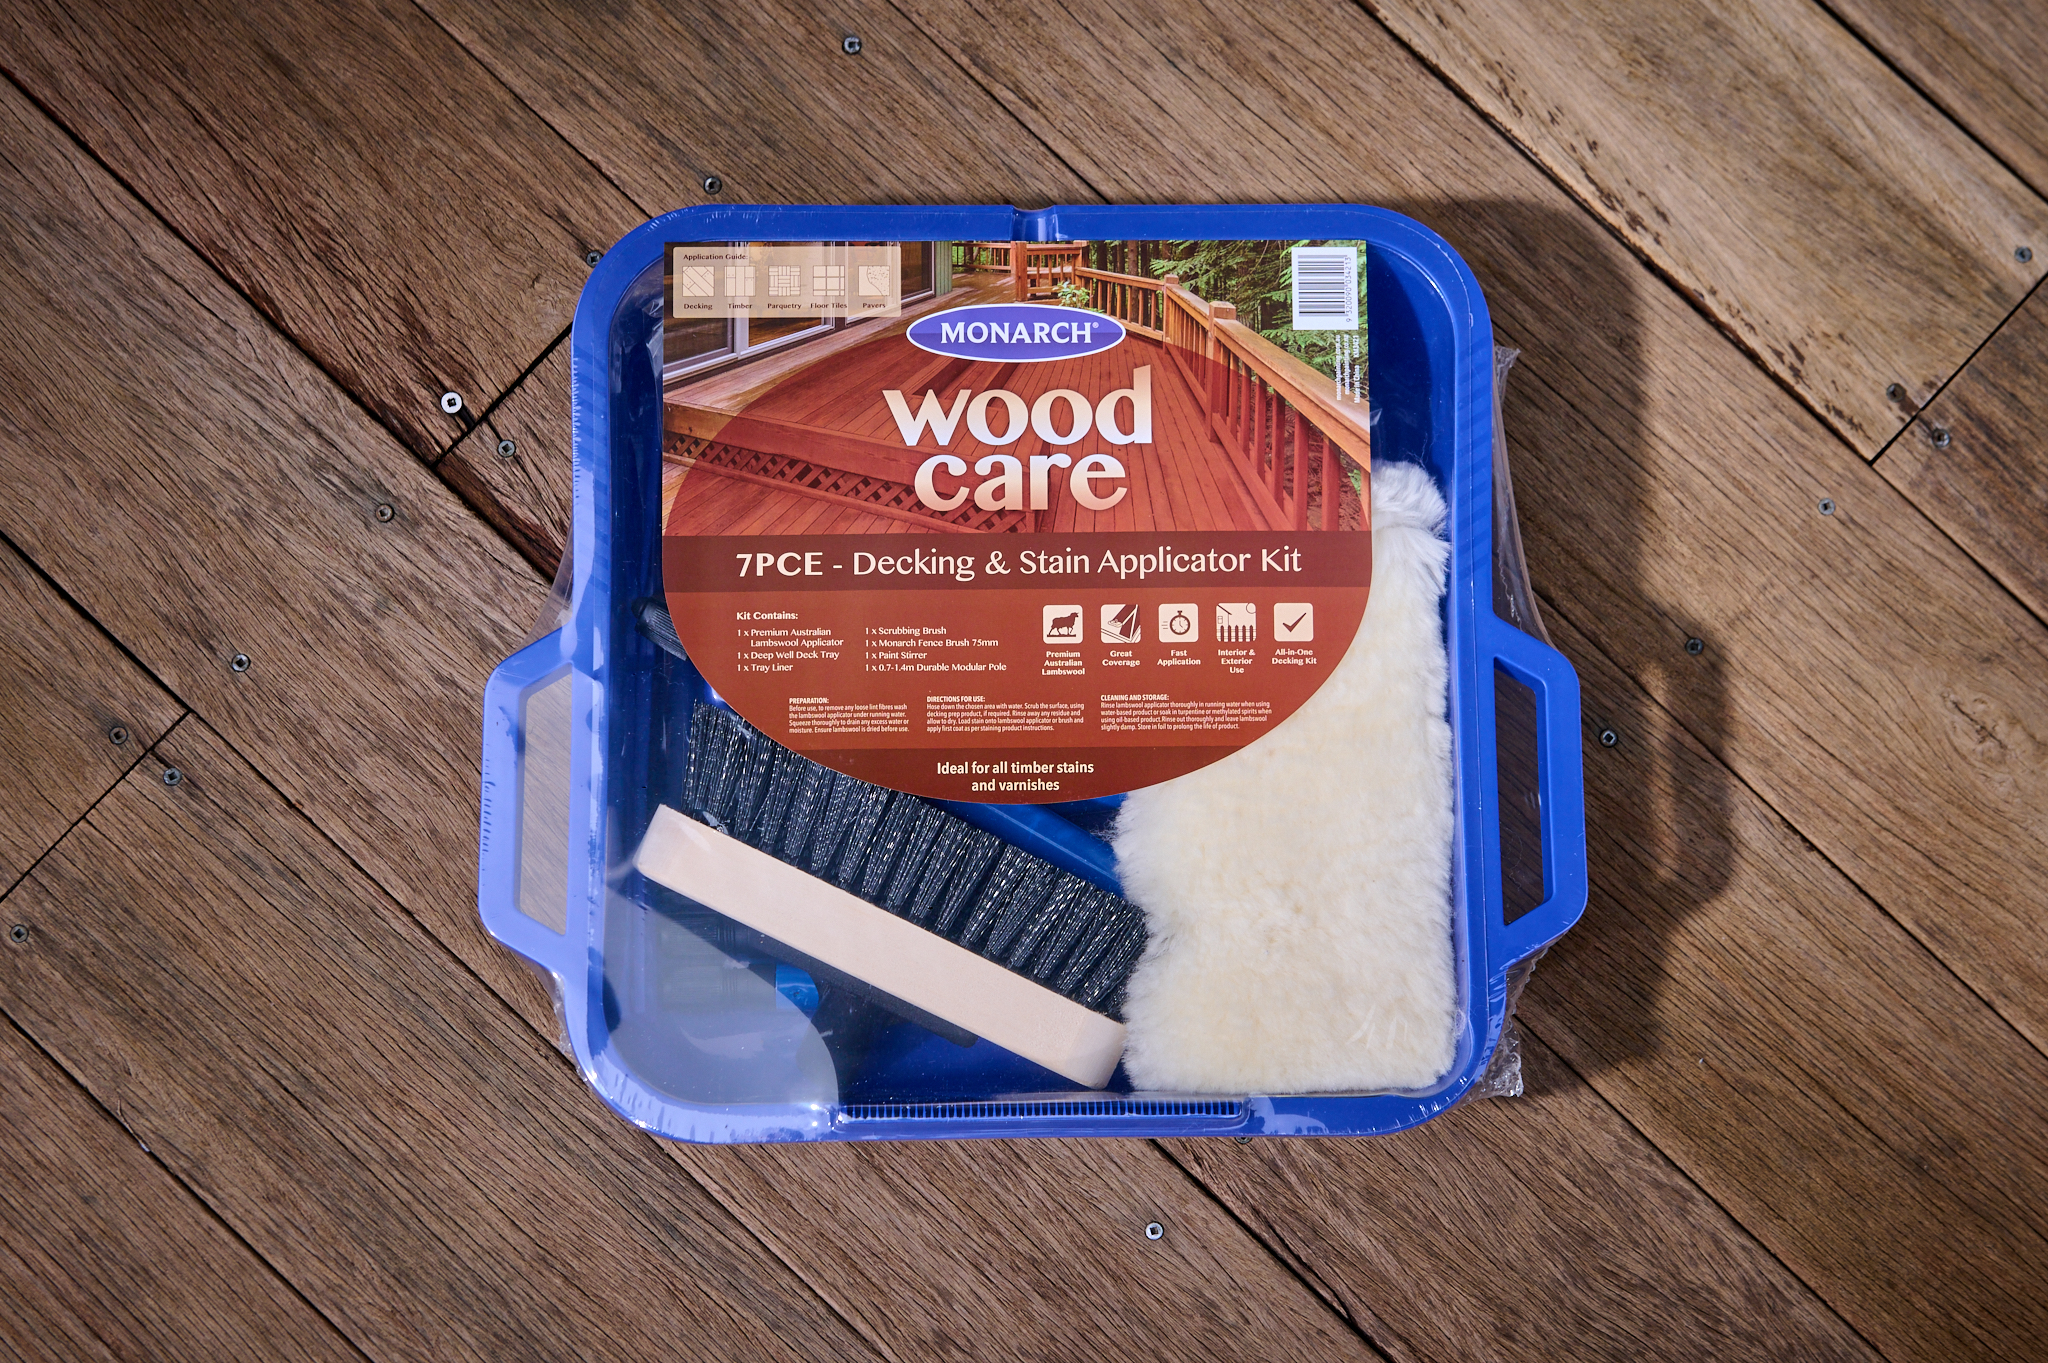
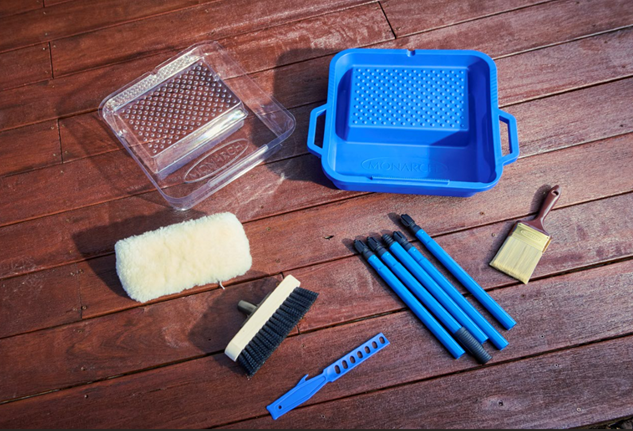
With this kit you can both prepare and apply your stain with professional precision. Each item plays an important role. The Monarch kit includes:
- 1 x Premium Australian Lambswool Applicator
- 1 x Deep Well Deck Tray
- 1 x Tray Liner
- 1 x Scrubbing Brush
- 1 x Monarch Fence Brush 75mm
- 1 x Paint Stirrer
- 1 x 0.7-1.4m Modular Pole
Step 1: Prepare the Deck
Good preparation sets the foundation for a long-lasting finish. Start by clearing the deck completely, remove furniture, pot plants, and any decorative items. Sweep away leaves, dust, and dirt so you’re working on a clean surface. Start by sanding the deck to smooth out rough surfaces. Mould and mildew can prevent even coverage and affect how well the stain adheres. Using the scrubbing brush and pole scrub thoroughly to remove surface grime and discolouration. Rinse the deck with a pressure washer or garden hose until the water runs clear. Then, allow the deck to dry completely, this may take several hours, depending on weather conditions.
Ideal conditions: Always stain your deck on a dry, mild day. Avoid working in direct sunlight or when rain is expected within 24 hours.
Step 2: Apply the Stain
Now comes the satisfying part, applying the stain. Begin by stirring the decking stain thoroughly to ensure it is evenly mixed. Pour it into your paint tray and attach the lambswool applicator to the Monarch pole.
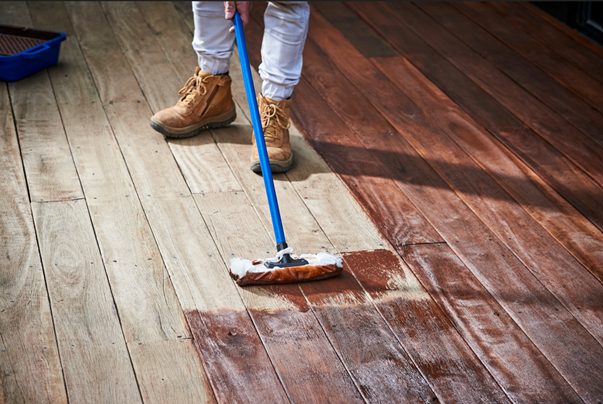
Start at one end of the deck and work along the full length of the boards, coating a few boards at a time. Move steadily, keeping a wet edge to avoid lap marks or patchiness. Working in manageable sections helps maintain a consistent finish across the entire deck.
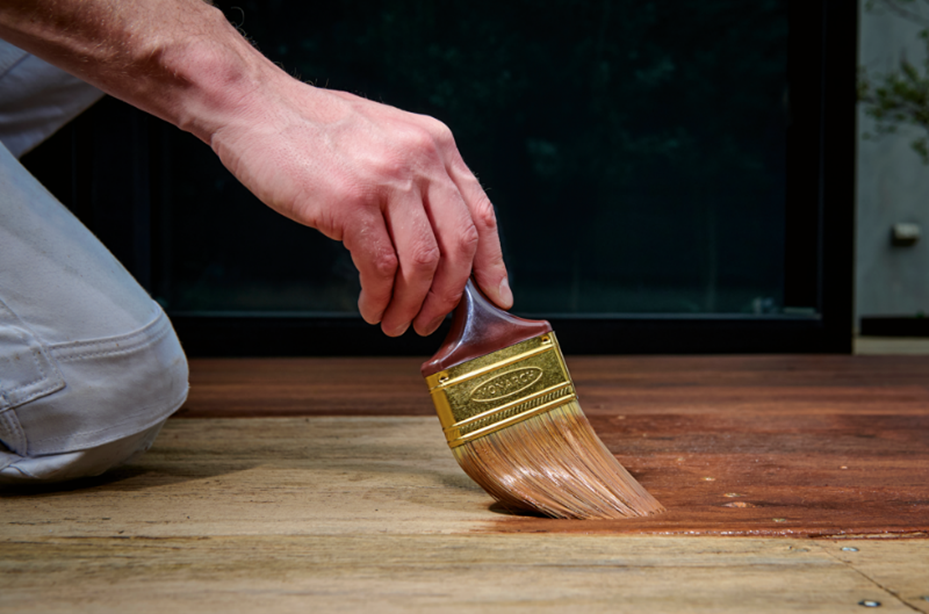
Use the paint brush from your Monarch kit to cut in around edges, steps, and railings where the applicator can’t reach. Apply the stain along the timber grain, never across it, to enhance the natural look and allow for smoother absorption. Once the first coat has dried completely, apply a second thin coat for optimal durability and colour depth.
Pro Tip: Avoid overloading your applicator. A light, even pressure helps achieve a consistent, professional finish with minimal streaking.
Step 3: Let It Cure and Maintain
After staining, allow drying time before walking on the deck or replacing furniture. Rushing this step can cause marks or uneven sheen. Check the stain manufacturer’s instructions for recommended curing times, which may vary depending on the product and temperature.
Routine maintenance prevents damage and keeps your timber deck water-resistant and UV-protected, ensuring it looks stunning season after season.
To maintain your deck’s finish:
- Sweep regularly to remove dirt and leaves.
- Clean the surface every few months with a gentle deck wash.
- Reapply a fresh coat of stain once a year or when the colour begins to fade.
Each Monarch tool is deliberately designed for control, precision, and durability, giving you the confidence to stain like a professional. With Monarch’s premium tools, you’ll not only get the job done faster but also enjoy results that look great and last longer.
When it comes to staining a timber deck, preparation, patience, and the right tools make all the difference. Monarch’s premium applicators and accessories simplify the process, helping you achieve a professional-looking result with minimal effort. Refresh your outdoor space, protect your investment, and take pride in a deck that’s ready for any season.


